The E-Invoicing Plugin for WooCommerce is designed to make invoicing easy and efficient. With its customizable templates, you can create professional invoices that reflect your brand and provide all the necessary information for your customers. Setting up your first invoice template involves several steps, each of which we’ll explore in detail.
Accessing the Template Editor #
there is two different way to access to the template invoice editor to customize your e-invoices:
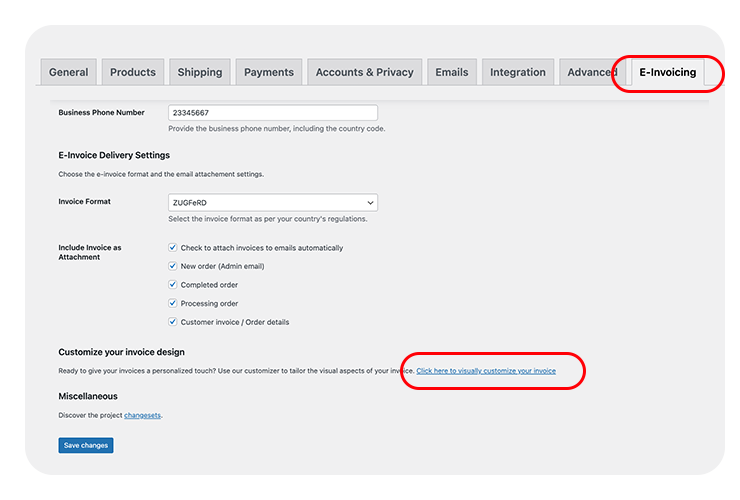
Option 1 : Navigate to the E-Invoicing Settings
- Go to WooCommerce Settings: Click on « WooCommerce » in the left side menu, then select « Settings. »
- Access the E-Invoicing Section: Click on the « E-Invoicing » tab within the WooCommerce settings.
- Go to Customize your invoice design and click on « Click here to visually customize your invoice« .

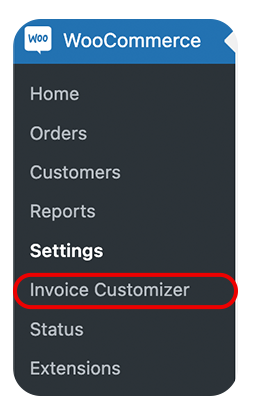
Option 2 : Navigate to the Woocommerce left sidebar dashboard menu
- Go to WooCommerce Settings: Click on « WooCommerce » in the left side menu, then select « Invoice Customizer. »

Choosing a Base Template : Ready to use designs #
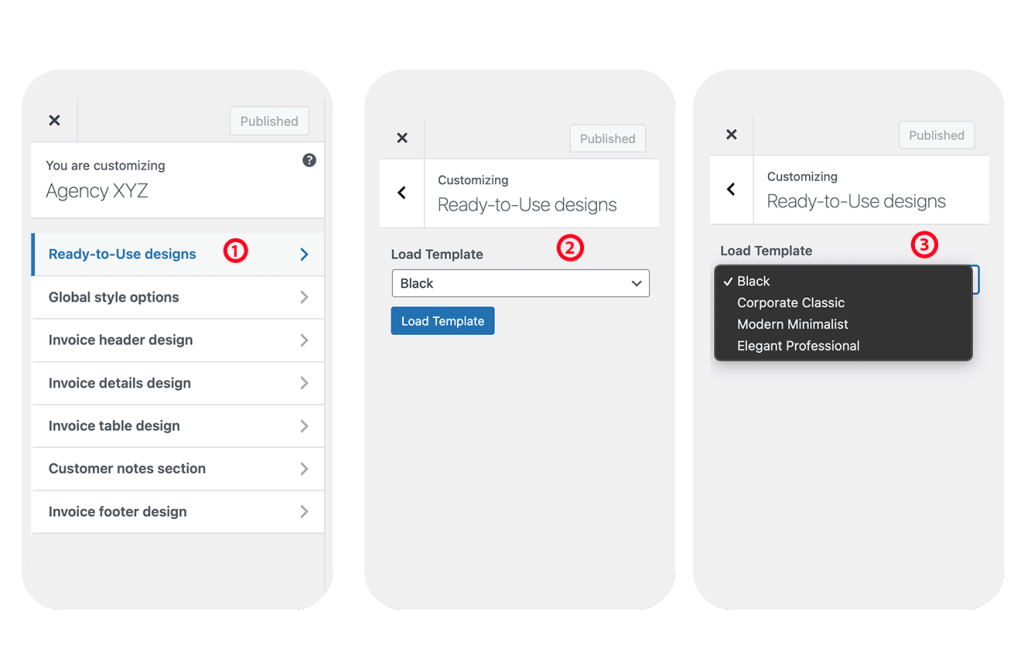
In the invoice template you will have by default Black template ready to use.
- Browse Available Templates: The e-invoicing plugin comes with several pre-designed templates. Browse through them to find one that suits your needs.
- Load Template: Select a Template: Click on the template you wish to use as your base. This will load the template into the editor.

Customizing the Layout #
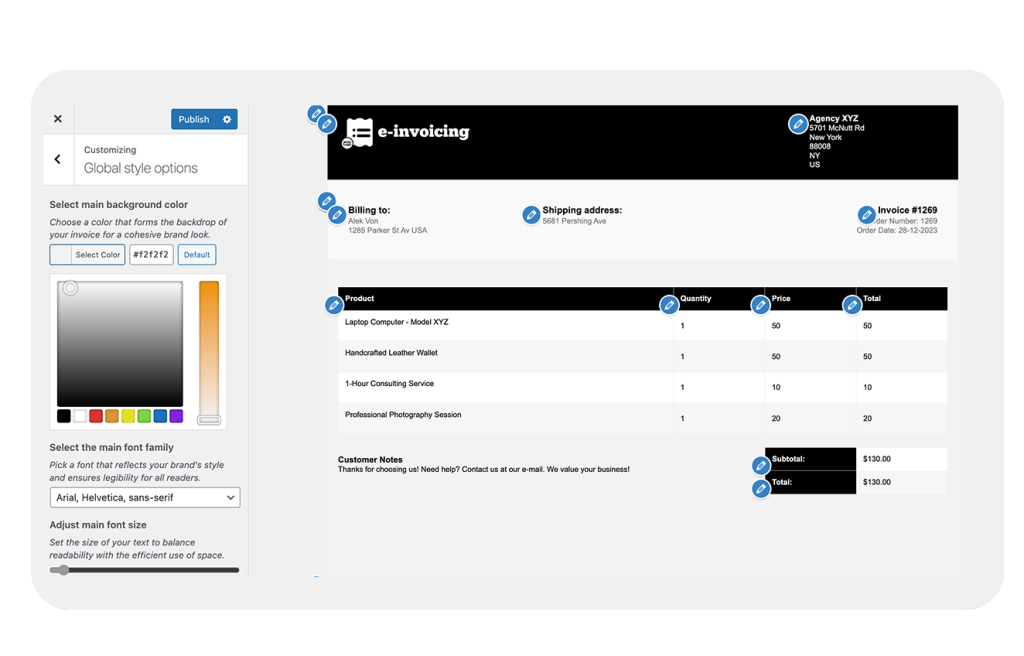
Global Style Option #
The E-Invoicing Plugin for WooCommerce includes a powerful Global Style Options dashboard, allowing you to customize your invoice templates to perfectly match your brand identity.


